ONE ROOM CHALLENGE | WEEK 3 - Planning the vanity
Hello friends! Welcome to week three of my One Room Challenge bathroom renovation! Last week was a big one, I got my plumbing roughed in and walls covered. This week, I did a 180 (literally, I turned around) to work on all things around the vanity. In this week’s blog post, I’m outlining details and specifications from light placement, vanity selection and pulling it all together! Keep reading for a step by step guide with instructions, diagrams, and videos below.
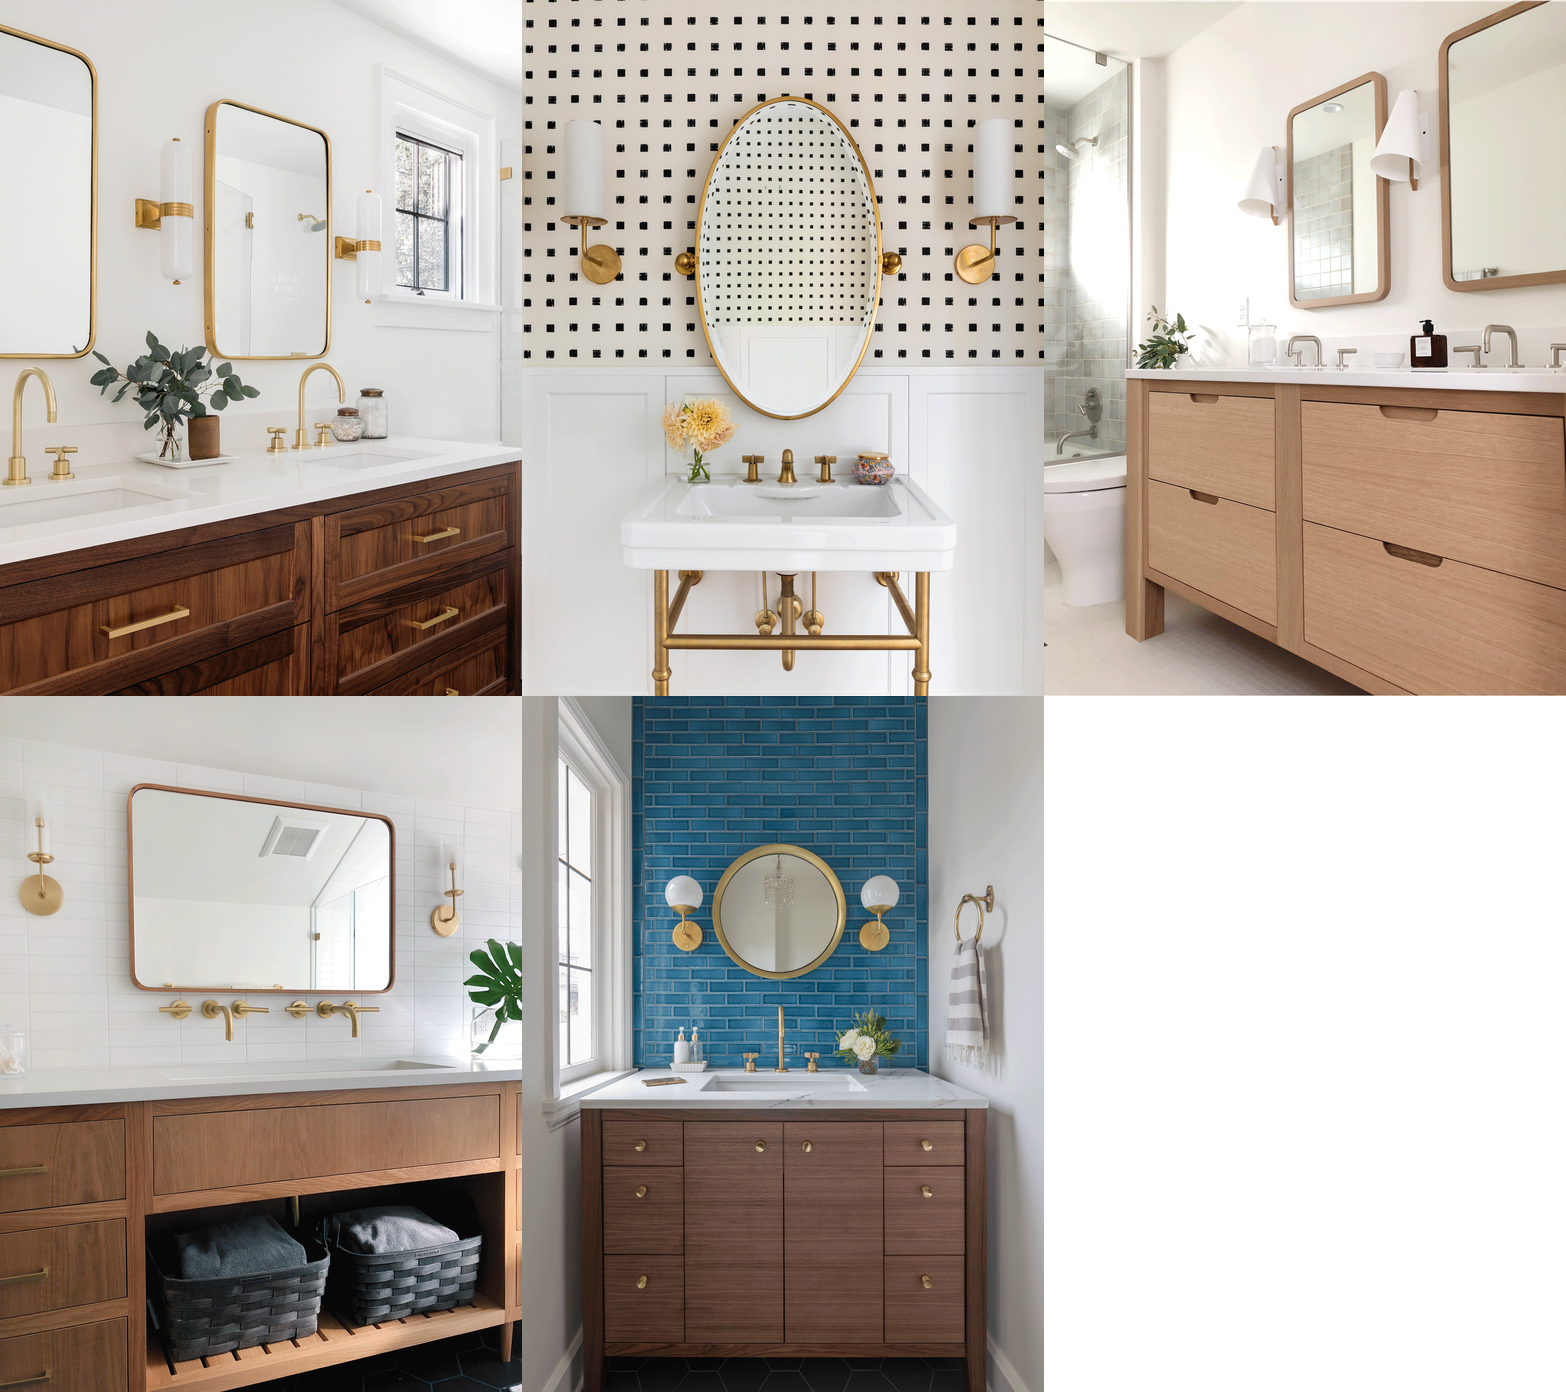
RECENT BATHROOM REMODELS FOR INSPIRATION: CASEWORK
PLANNING A BATH VANITY
There are three elements to think about when planning a bathroom vanity; the base cabinet, vanity top/sink and faucet. Combined together, you have your bathroom vanity. Before you start thinking about cabinet door styles and types of surfaces, you'll need to address a range of other variables to ensure the best fit for your vision.
Not all bathrooms are created equal. Are you designing a Master, Guest, Kid’s or Powder Bath? This will set the tone for the project because a bath for growing children won’t have the same requirements as a Master Bath. Consider the following:
open or closed storage
overall width - or how many people will be using it at one time
two sinks verse one sink - see above
faucet location - deck (counter top) or wall mount
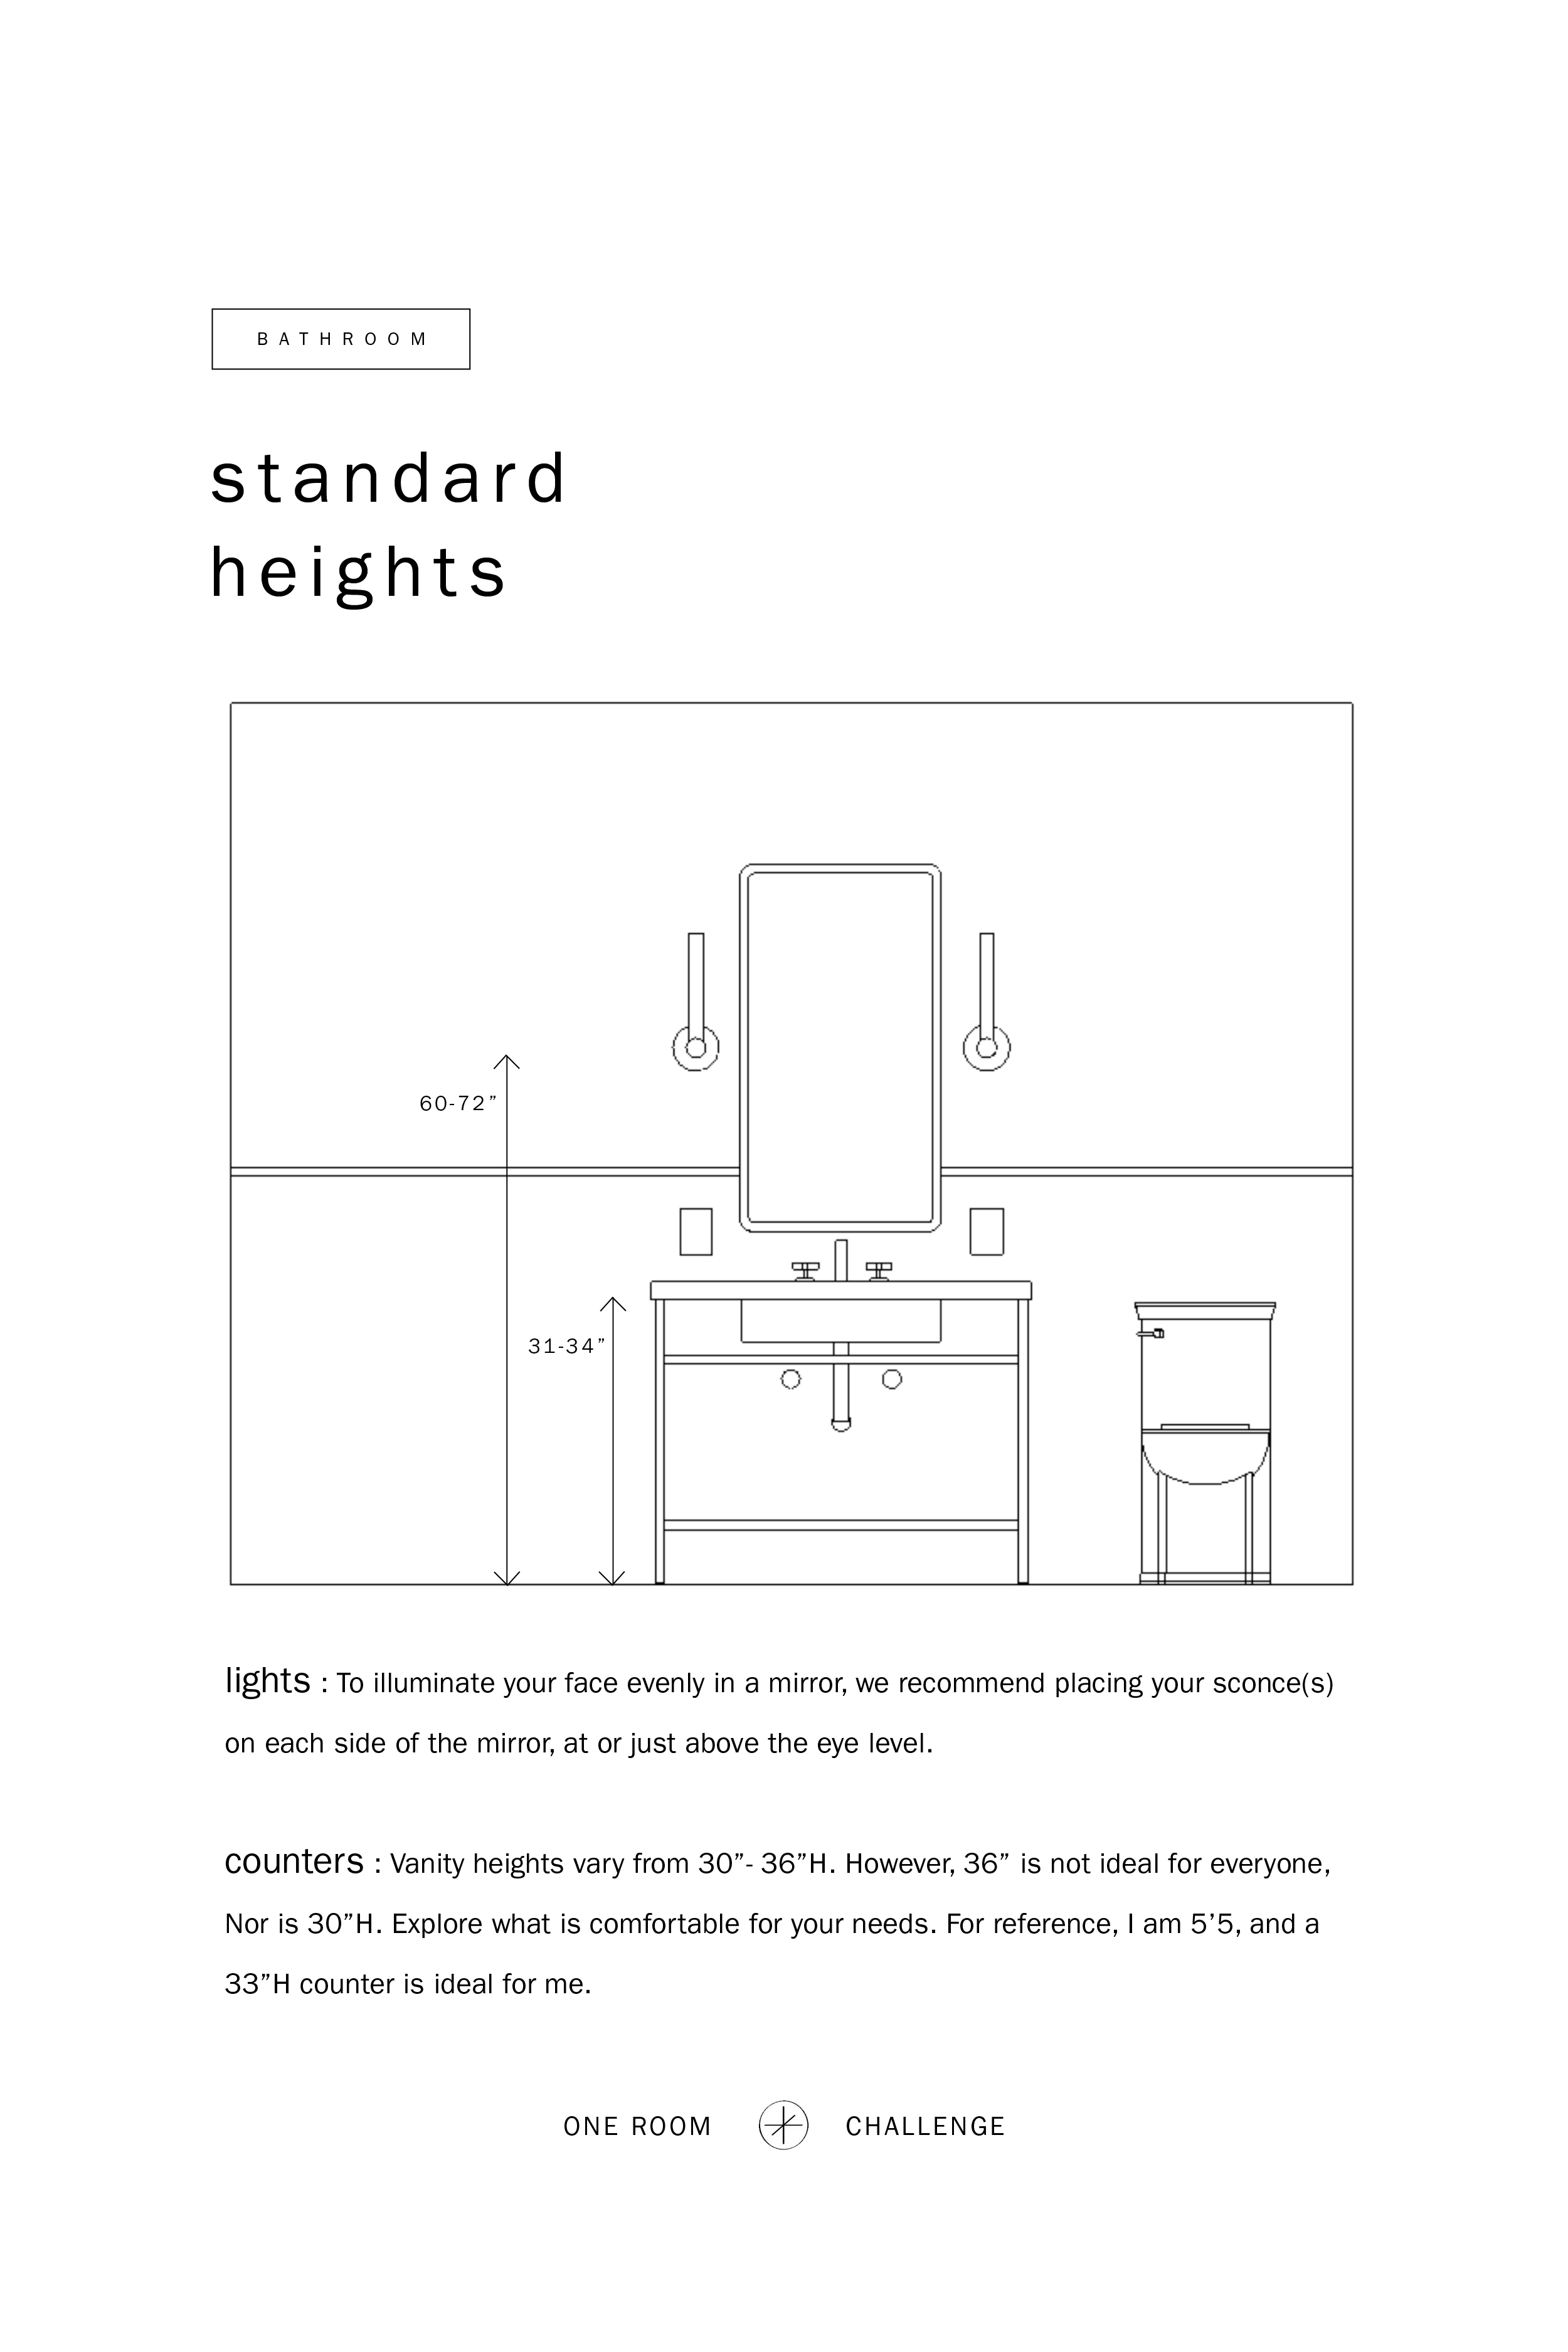
height - I always ask, who is using it and how tall that person is. Typical vanity height is 31-34” but there are no rules and if you’re doing something custom, taller or shorter may work better for you. I like 33” high.
What’s about style? Aside from a walk-in shower or a freestanding tub, the vanity is a big focal in a bathroom. It’s what you’re going to stand in front of each morning and evening. Choosing one that fits your needs for storage and style is important because you’ll be looking at it every single day.
How durable does it need to be? Consider who is using the bathroom. Will it be yourself or your entire family? If it’s a lighter use like a guest or powder bath, a marble top without storage could be fine. If this is the only bath in your home, an integrated sink or undermount sink with a quartz counter will be more durable than marble. Gloss finishes are also easier to clean than matte.
Are you remodeling to sell or for yourself? Bathrooms are an investment. If you plan on staying in the home long term, you might look for higher quality materials or invest in fixtures you love. Investing in a quality faucet is going to pay for itself. Think about how many times you turn on the sink each day.
Because I have storage in my bathroom and a linen closet outside of my bath, I opted for an open vanity. The room is fairly small, at 65sf, and creating visual openness will make the room feel a little bit larger. There’s a shelf below the sink for towels and baskets for everyday items. The sink is an integrated counter sink top. Not something I normally select and I did this for two reasons. The biggest reason is time constraints. I didn’t think I could get the vanity fabricated and on site, a counter templated and installed two weeks later then plumbing installed in time to finish the project. I also wanted simplicity in materials. The sink is the counter. The counter is the sink. Kinda nice and super easy to clean!
Then the faucet, it’s from Watermark and basically the first thing I selected when planning my bathroom. The Blue 37 Collection from Watermark is a favorite of mine. It’s so simple and paired down. I love the cross handles but levers are an option. One of my favorite things about Watermark, is their ability to mix and match details. Add in custom finishes and you have a something you’ll be excited to use every single day!
Watermark products are made in Brooklyn and has been since 1976.
Here’s a look at the drawings I created for my custom vanity.
BATH SCONCE LIGHTING
Wall sconces are an excellent way to add a source of accent or general lighting in the bathroom. The best place for lighting at the vanity is on each side of the mirror. Mount the lights at eye level to provide great lighting on your face.
For the bathroom, I selected the Aged Brass Cornwall Sconce from Hudson Valley, and located them at each side of my mirror. I looked at every fixture Hudson Valley offers and narrowed it down to the ones below. Because my space is small and the profile of the sconce is as important as seeing it from the front, the Cornwall won! I love the brass finish and classic details that take inspiration from a 20th-century apothecary sink with the pipe and ball metalwork. It’s timeless and modern at the same time! Here are some others I looked at for my remodel.
SELECTING A VANITY MIRROR
To start, measure and note the height of the wall where you'll hang the mirror. As a rule, an every day mirror should measure smaller than the vanity and be at least 6’ high. For my bath, I selected the Kye Black Rounded Corner Mirror from Varaluz. It’s narrow enough for two sconces to sit on each side without being wider than my vanity and tall enough for someone over 6’ to look into it without ducking.
GET THE LOOK: Mirror
CHOOSING A VANITY SINK
For my sink, I selected Nameeks Mars Rectangular White Ceramic Wall Mounted. I chose this sink for a few reasons. I like the clean, squared off lines and there’s plenty of room for bathroom accessories on the counter. It’s also an integrated counter sink. Meaning the sink is the counter. When planning, I was concerned about having the vanity fabricated, a sink templated (from template to install is usually 2 weeks) and plumbing installed in time to finish the project. I’m really happy I went this route because delays are happening in other areas and this one less item I have to worry about coordinating.
GET THE LOOK: Sink
FINDING THE PERFECT HEIGHT
VANITY LIGHTING
When it comes to interior lighting, bathrooms have specific lighting needs. Often there's a single ceiling fixture and that is not enough for most people. Wall sconces are a great source of supplementary light. Mounting them on either side of the bathroom mirror is best for casting even light across the face, which eliminates shadows. Wall sconce fixtures should be softly flattering, yet bright enough to perform activities such as makeup application and shaving. I like frosted or opal glass shades for bathroom sconces because they are easier to clean when moisture is involved and the lighting is easier to look at because it’s diffused with the opal shade. For bathroom sconces, I stay away from metal or linen shades and bare bulbs. There is an exception if you are planning a powder or guest bath. Opaque shades don’t let a lot of light shine through and linen is more difficult to clean.
VANITY COUNTER
Counter heights have raised over the years. Traditionally bath counters were 30-31” high. This is low if you are on the taller than 5’-4”. I prefer counter heights around 33”h in small bathrooms and 34” high in more open bathrooms. If you’re taller you might like 34” or 36” (kitchen counter height) for your bath. Something to test if you are creating a custom vanity.
Below is a diagram showing standard heights for both bathroom lighting and vanities.
CONTROLLING THE LIGHTING DIMMER AND OUTLET
Adding lighting controls in your home, from simple wall switch dimmers to programmable control systems add adjustability and control. The following are benefits of dimmer and lighting controls:
Flexibility for the use of lighting in each room - it’s nice to have low light levels late at night or first thing in the morning.
Save energy because of reduced wattage
In turn, save money
The Legrand adorne Whisper Style Dimmers feature clean lines and a fluid motion allowing you to turn lights on and off with ease and a slide for dimming or brightening lights. Ideal for typical residential and light commercial applications, the Tru-Universal Dimmer is the simple solution to all your dimming challenges. It works with any 120V dimmable lamp, load and fixture.
DIMENSIONS : Depth (US): 1.20", Height (US): 1.77", Width (US): 1.77"
TECHNICAL INFORMATION: Volts (AC): 120 VAC, 60Hz, Watts: 700W
Next up, we have the Legrand adorne GFCI Outlet. This is the outlet of the future, perfect for upgrading the look of outlets in your kitchen, bathroom, and outdoor space. With a sleek white design, and safe lock protection - this outlet is more than just looks. It took about 10 mins to install, check it out!
DIMENSIONS : Depth (US): 1.82", Length (US): 2.66", Width (US): 1.77"
#theadornecollection #thebeautifulswitch
INSTALLING YOUR OUTLETS or DIMMER
Once you’ve ordered your outlets and dimmers, It’s time to install! All Legrand switches, dimmers, outlets, and accessories fit in your existing electrical box, meaning you don't need any new wires -- simply remove the old device and swap in a replacement. It only takes about 15 minutes. Watch the step by step video below!
Cheers!
Check out Week 2 where I’m outlining a budget, design schedule and plumbing details. And go all the way back to Week 1 to see the inspiration and each selection for my bathroom. Be sure to check out each of the amazing designers doing a room of their own in the links below.
One Room Challenge Participants
At Home With Ashley | Casey Keasler | Dorsey Designs | The Farmhouse Project | Home Made by Carmona | House of Funk | House of Jade Interiors | House Seven Design | House That Lars Built | Inspired by Charm | Jana Bek | Jessica Brigham | Kelly Golightly | Murphy Deesign | The Pink Pagoda | Sarah Gunn | Sherry Hart Designs | Sugar & Cloth | Veronica Solomon | Vintage Revivals | Media Partner BH&G | TM by ORC


