
ONE ROOM CHALLENGE | WEEK 1

Design by Casework and Photo by Nicole Mason
First of all, if you are new here, welcome! I am so glad you stopped by.
Since some of you may be new to Casework, allow me do a quick introduction. I’m Casey, the founder at Casework, an interior architecture studio located in Portland, Oregon. Our projects are focused on environments and how they are experienced and include; boutique commercial, residential, and retail. We always think with our hands, and understand the understated.
Feel free to browse through our other various projects, We love to share!
About the Challenge
Today kicks off my first ever One Room Challenge! I am so excited to be a Featured Designer and share my plans and budget for my bathroom remodel! The One Room Challenge is a 6-week series where I’ll be sharing my process each week. Big thanks to Linda from Calling it Home, for being our host and coordinating 20 different rooms and designers! In a nutshell the ORC is an online design event where participants completely renovate a room of their choice over the course of six weeks.
Each season the work of a select group of 20 talented designers as well as a number of guest participants are highlighted. The One Room Challenge is a celebration of original ideas, creativity and inspiration, I am so excited to be a part of this challenge!
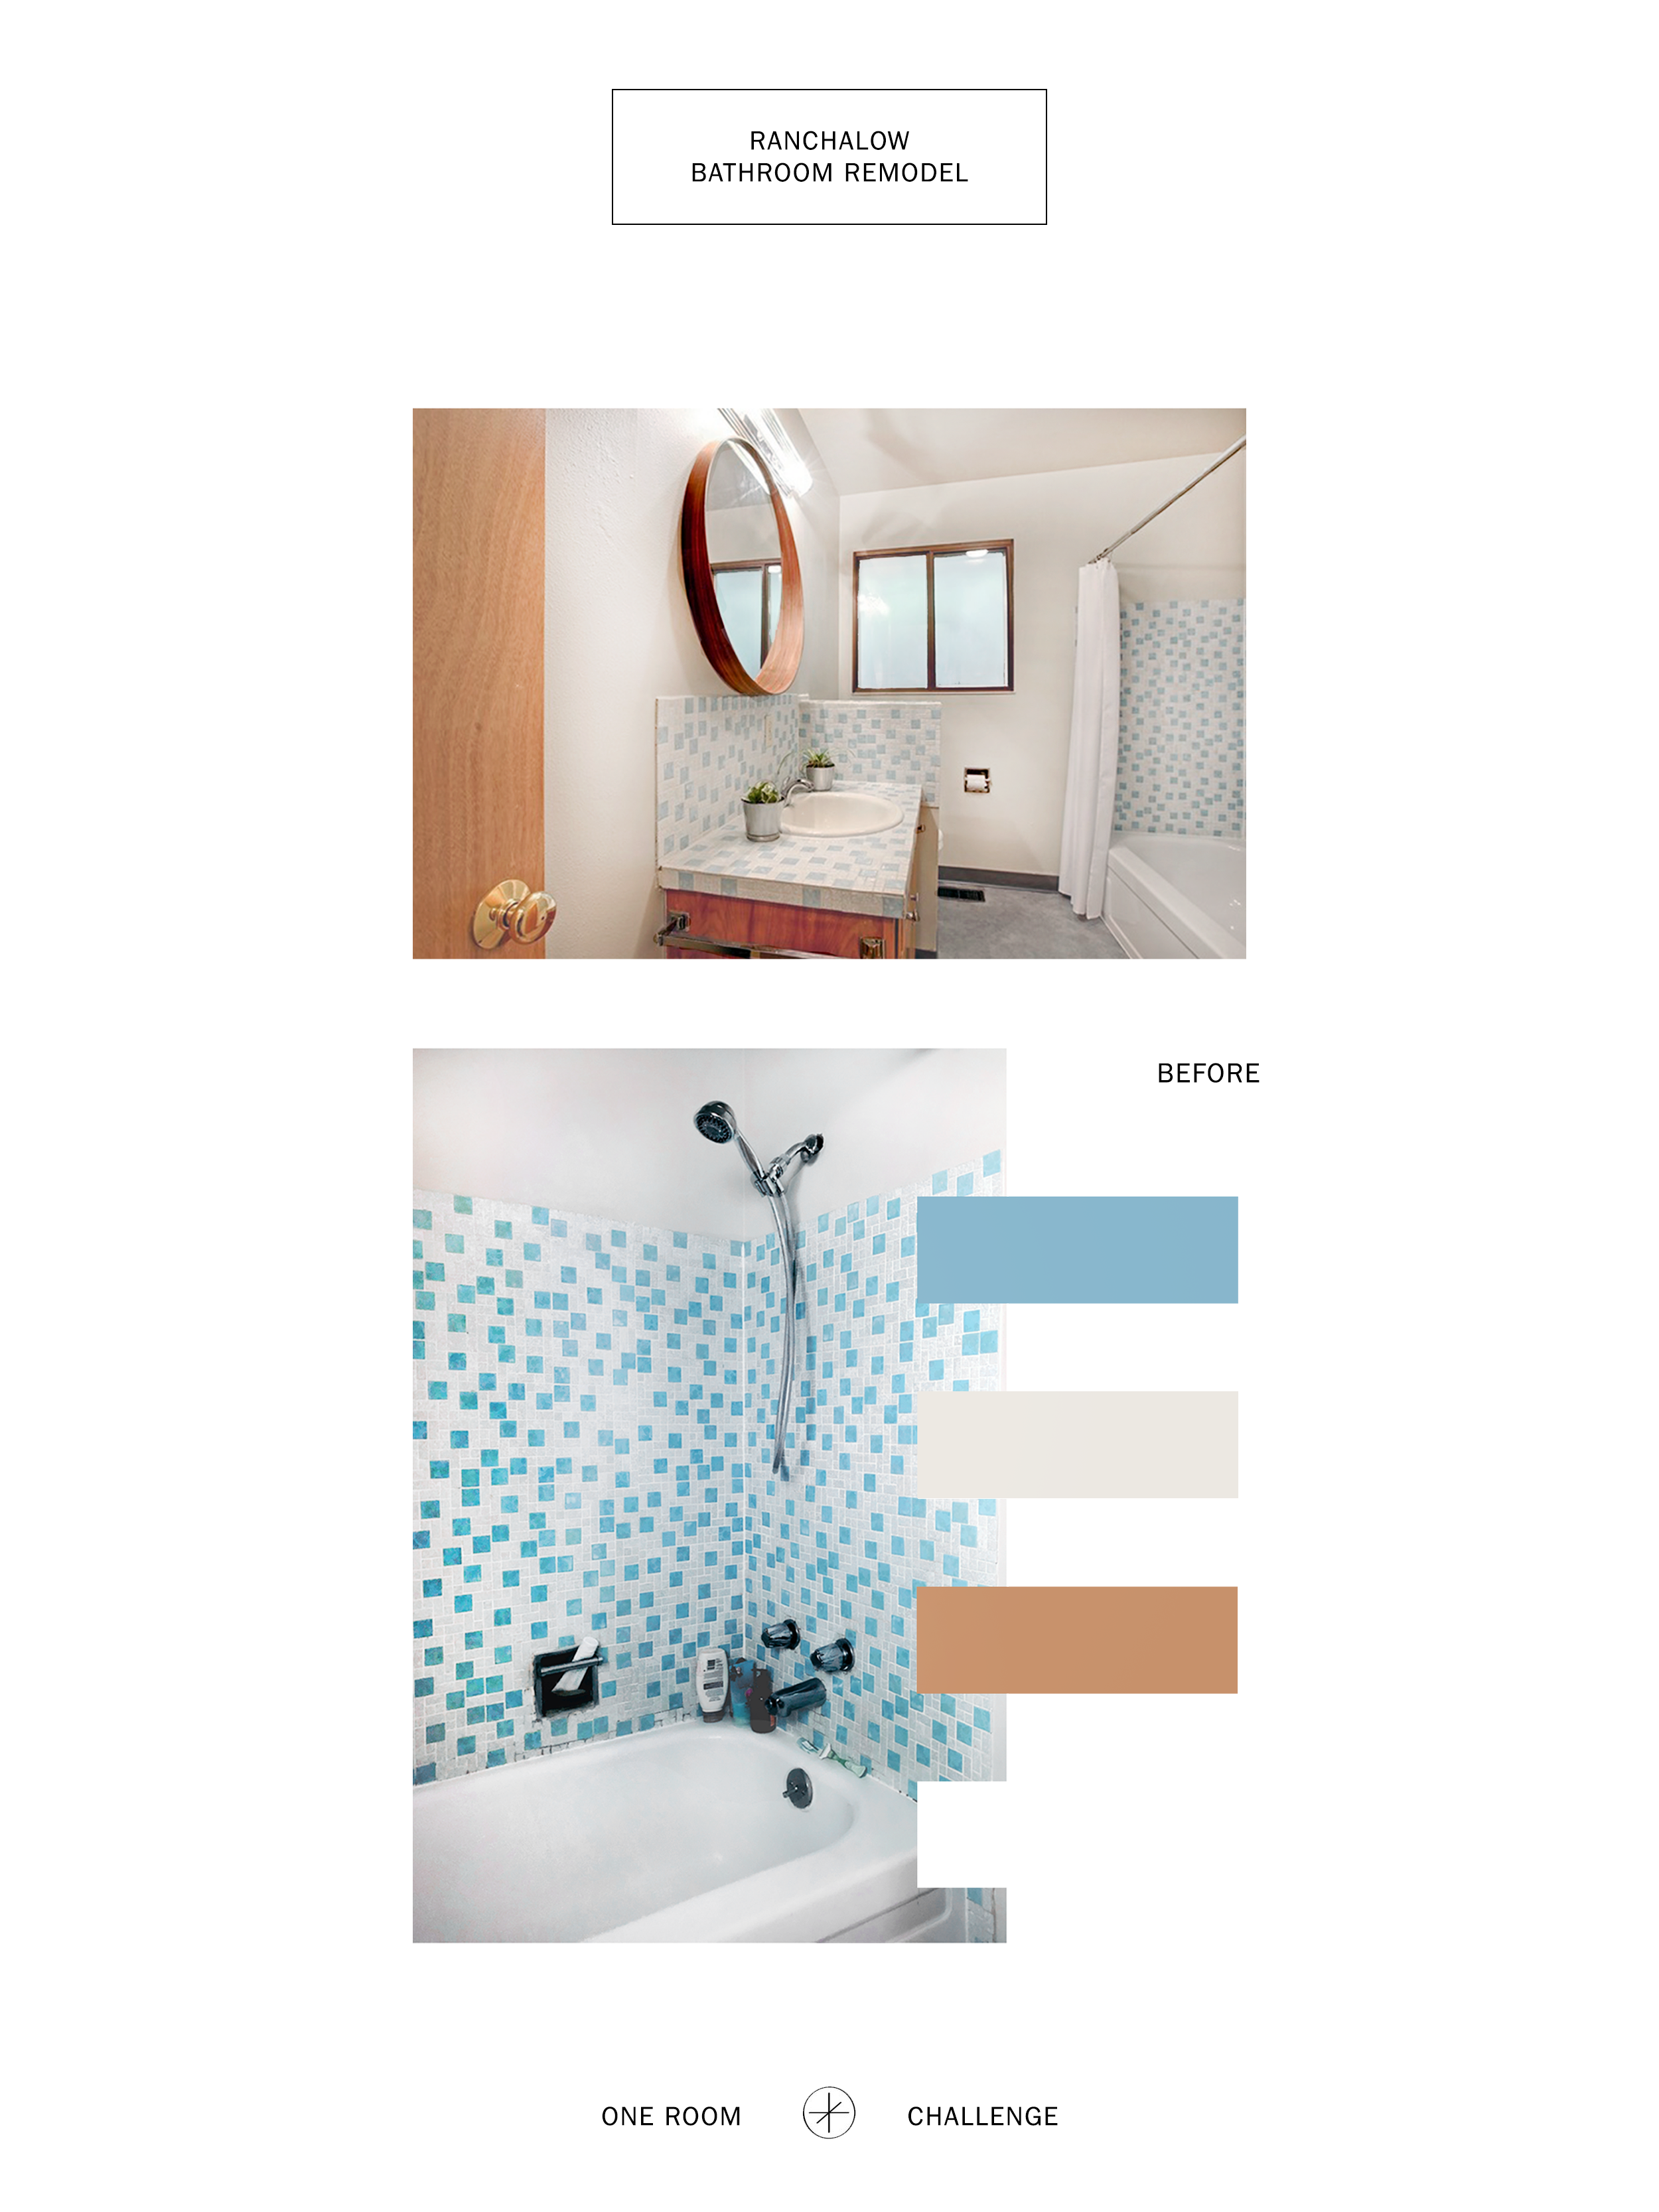
The Before
Let’s just say, it can’t get too much worse! In 2017, I purchased the Ranchalow, a 1966, 1,250 sf 3 bedroom - 1 bath Ranch and Bungalow style home. Over the past year, I’ve been remodeling the home, room by room. I started with the smallest room, my dressing room, painted, installed an exterior fence and made small updates like light fixture changes throughout the home over the past year.
I’m incredibly excited to tackle my bathroom renovation with a deadline in sight! As you can see, the bathroom is in original condition, aside from flooring, paint and mirror updates, NOTHING has changed. Because this is the ONLY bathroom in my home, I’m a little nervous to live through that process but am up for the challenge. I’ll definitely be sharing what I learn from the adventure!

The bathroom is small, so only one person could be in there at a time, unless someone was taking a shower. The closet door was always halfway open and on the wrong way so it was awkward to access. Without being able to add additional square footage, I wanted the space to feel bigger and brighter and definitely cleaner.
There are few things that can be done to make a bathroom feel larger and brighter without actually gaining square footage.
Remove the awkward storage. This storage is great but it was less used items that I can put in the hall closet
Install an open vanity instead of closed - this is visually more open and in turn makes the room feel more spacious
Remove the shower curtain and install glass shower doors - again - not actually more space but more visual space
Install tile to the ceiling in the shower
Paint the walls white. This will instantly brighten a room and white always looks cleaner than off-white, tan or beige.
The Plan
My boyfriend, Casey, YES we are BOTH CASEYs, are doing the majority of the work ourselves to save money. Bathroom remodels can be incredibly expensive because there are so many different trades involved, which means lots of labor. The biggest and the labor is at least half the cost of a remodel.
I decided to tear out the existing flooring and sub floor, vanity and sink, mirror, toilet, tile backsplash, shower surround, all shower plumbing fixtures, all bathroom accessories, the closet door and interior shelving. I had planned to keep the tub. I did this because it was in ok shape and would keep my costs and labor down. Also, this is my only bathroom in my home, so I wanted to decrease the down time of not being able to take a bath in my own home. After all of the demo was complete, I decided to replace the tub. It was scratched, a tin tub (not cast iron) and I felt like I would regret not replacing it when everything else was brand new.
Demo took 4 hours and is hard work but completely gratifying! It feels good to have a clean slate. It was easier to demo the drywall behind the tile than to chip away at each tile while trying not to put a hole in the wall. So we took it down to the studs in a few places.
Week 1 to do list: April 3 - Project Overview (follow along on Instagram stories to see more behind the scenes)
demo bath room
buy a last minute tub!
pick up grout, wonderboard, screws, floor transition strip
install shower valves (Mike at Rose City Plumbing)
frame shower niche location
remove the bath fan
paint the ceiling
replace and patch all drywall
remove toilet
prep the floors by adding a tile ready subfloor
tile floor
Week 2 to do list: April 10 - Blog Post on Remodel Order of Operations / Design Downloads / Plumbing Selections, Installation and Why/When I Hire an Expert
grout floor
relocate the electrical outlets and sconces
patch drywall
paint walls
paint trim
tile wall
grout wall
replace the toilet
replace the bath fan
Week 3 to do list: April 17 - Blog Post on Tile and Tile installation / Ordering Materials & Design Schedules
install the vanity
install the sink and plumbing for sink
install shower trim
install shower doors
install door hardware
Week 4 to do list: April 24 - Blog Post on Electrical / Hardware Selections / Accessories
replace light switches
install accessories (hooks, towel bar, shelves)
hang artwork
hang mirror
trim carpentry
paint (walls, trim, door)
Week 5 to do list: May 1 (finish any last minute details)
paint touch up
style
photograph
Week 6 to do list May 8 (final post with finished photos
final blog post with finished photos!

Inspiration
In keeping with the home’s original style - part Bungalow (aka Craftsman or Arts & Crafts depending on who you ask) and part Ranch (Mid Century), I wanted to take those two styles and make them feel current. So I selected soft, muted colors in the tile to as a nod to the Bungalow side, brass detailing to bring out the Mid Century details and black metal finishes to bring the bath to 2019. Here’s a look at some of the inspiration pulled early in the process. You can find more on my Ranchalow Pinterest Board. Neutrals with a mix of black and brass details!


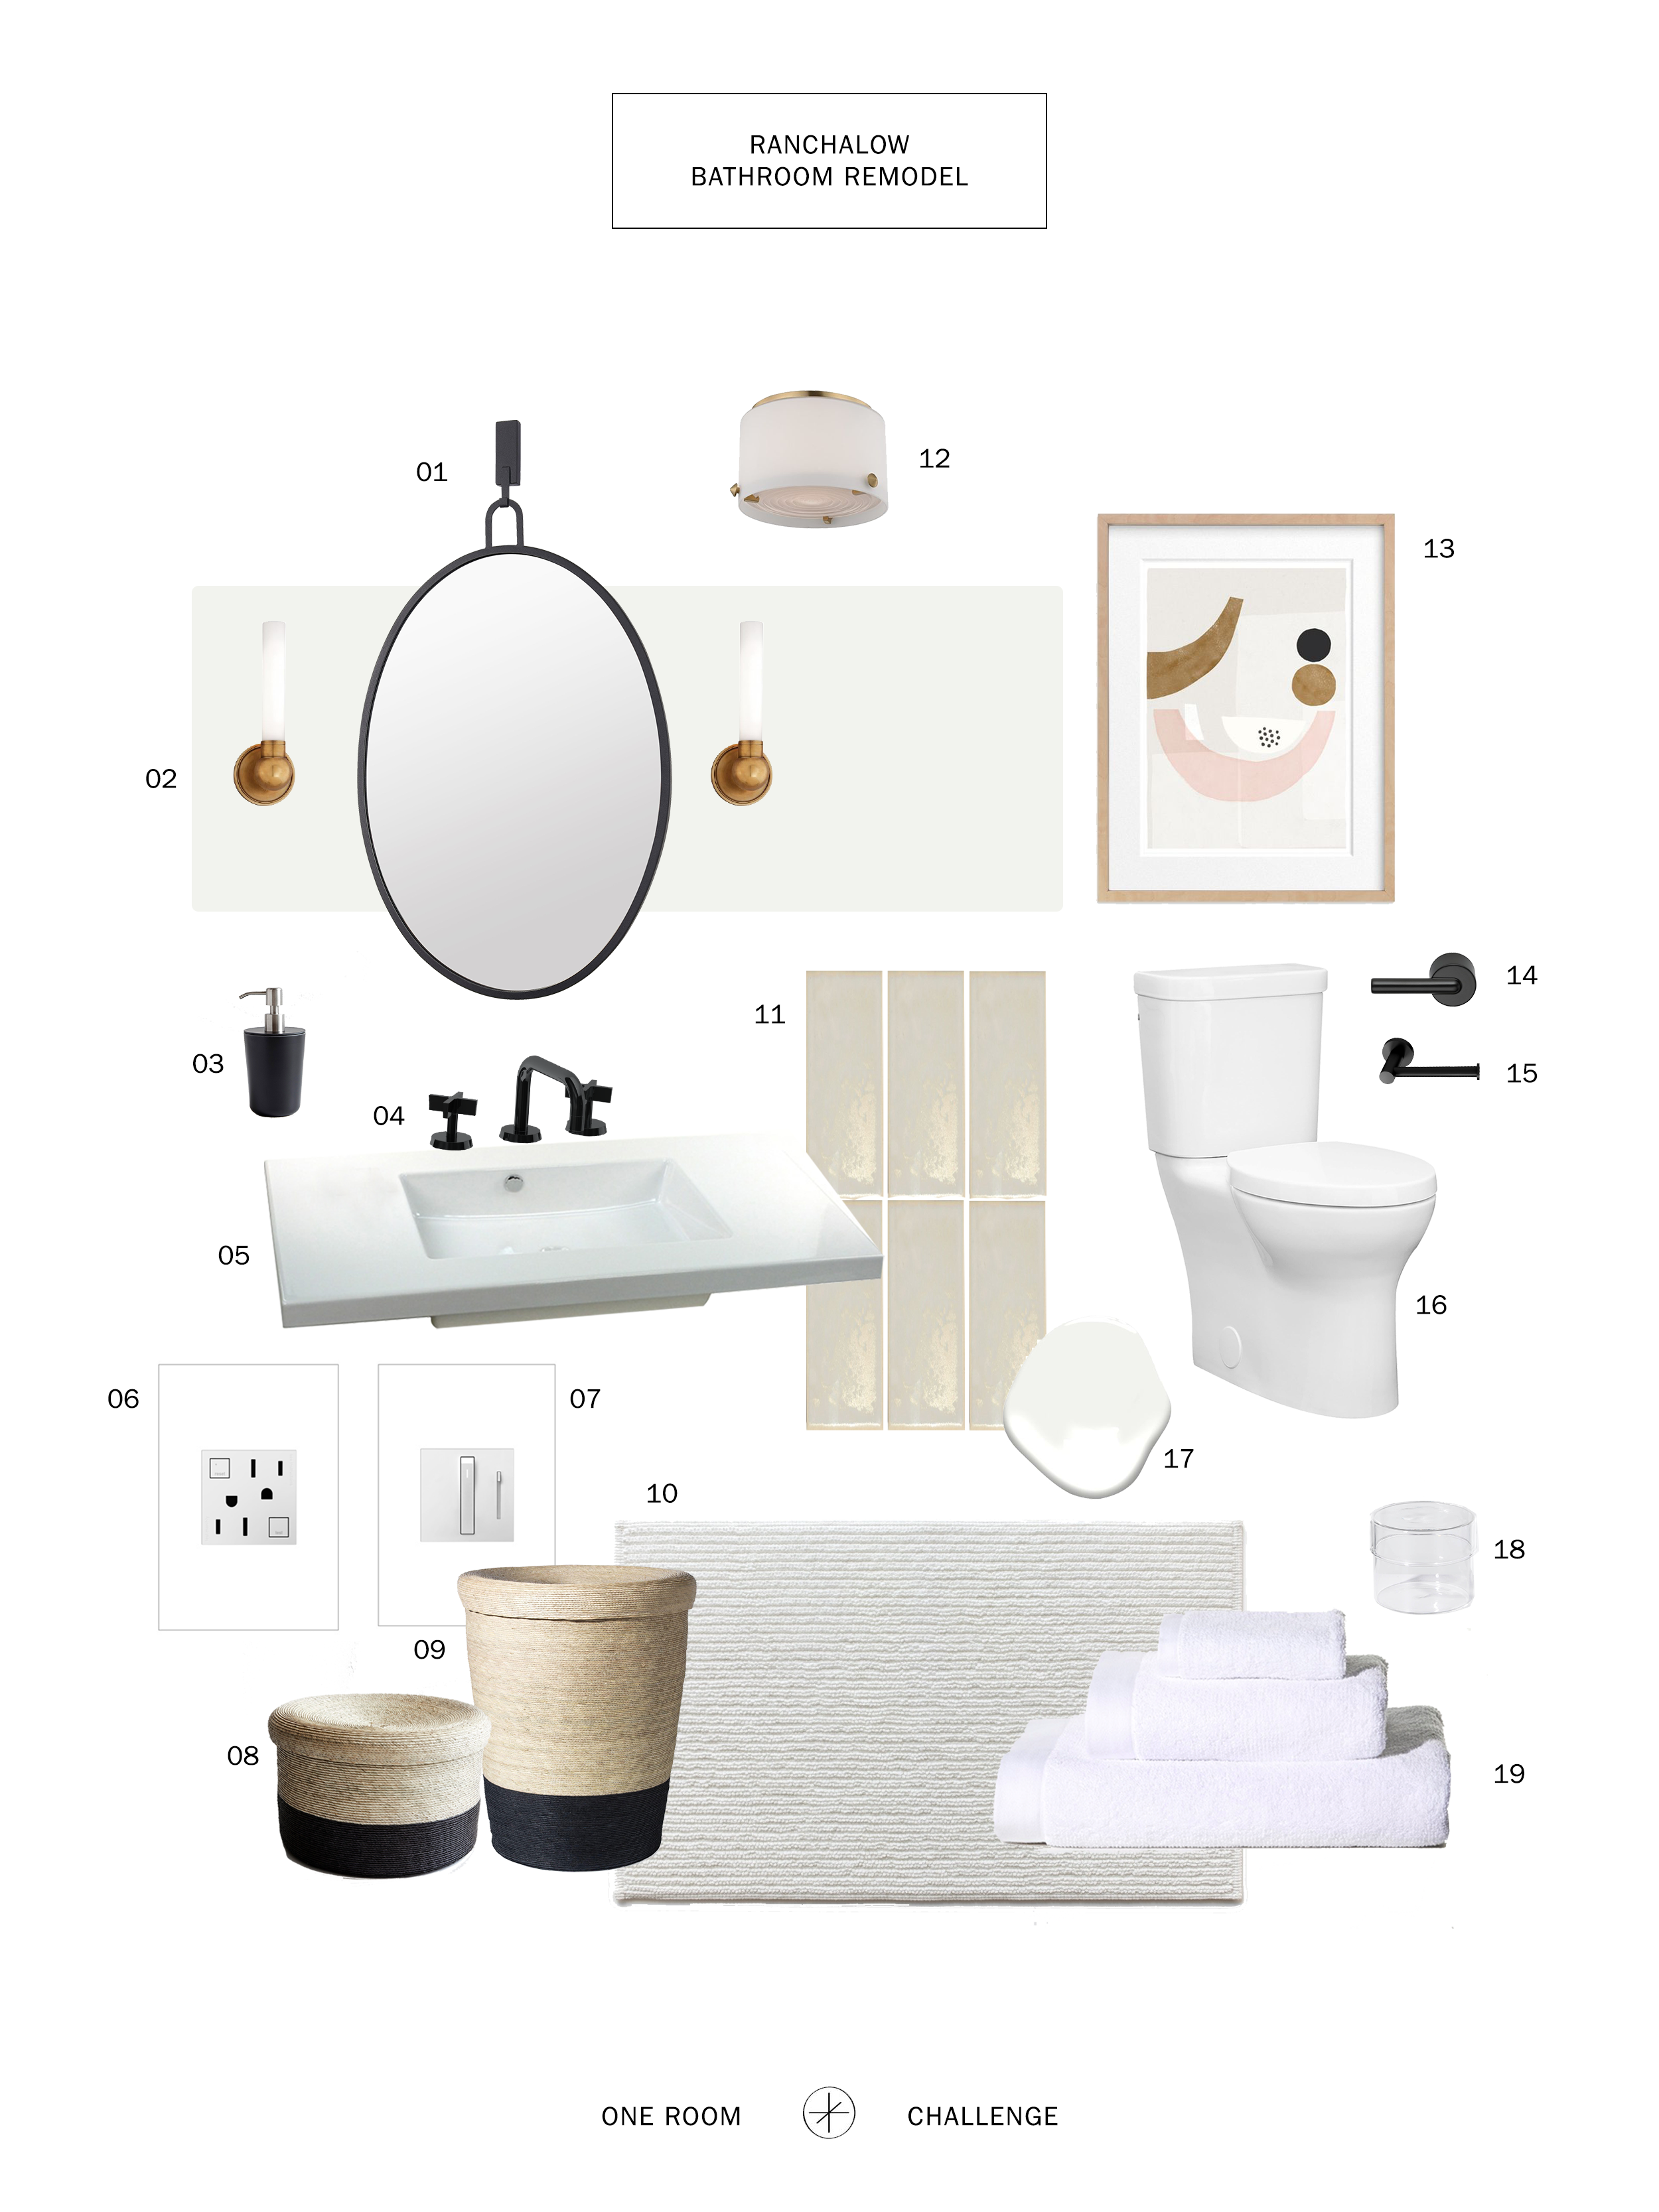
Final Selections
When designing, I always start in plan, I work through layouts and select a favorite then move to 3d. Everyone in my studio works this way too. It’s the most straightforward way to see how a room and materials relate to other materials. We use Sketch Up which is a free tool and incredibly beneficial in understanding how your project is going to come together. And the true benefit is that it can be as loose or as detailed as you want. Often, I can visualize without a drawing but a drawing, sketch or rendering can help you see all the 2d details in 3d and make a more informed choice.
Once I had the plan set and knew I wasn’t moving the plumbing fixtures around too much, I started designing an open vanity made from 1x1 steel frame and am having that fabricated locally. I didn’t think I had time to install the vanity then template for a counter so I choose an integral sink and counter set up that will serve as both. From there, I selected a black faucet from Watermark and opted for a matte black finish for the remaining plumbing fixtures.
After weeks of research, sampling and pricing, I landed on a diamond shape tile from Pratt and Larson in three tones of green. The walls will be a vertical stack 2x6 tile in a cream color with a wainscot behind the sink and full height at the shower surround. The craftsman colors from Pratt and Larson bring out the Bungalow side of my home and I selected brass for the hardware and light fixtures as a nod to the Mid Century Ranch style of my home.

The Details
Planning is key in being sure your remodel process goes as smooth as possible. From drawings to budget, we do this for our clients, and my project is no exception. Because this is my only bathroom and I have a deadline to complete the work, I want as much as possible so there are limited delays and changes in my budget.
Below are some drawings for the custom vanity I designed and am having made.

I am so excited to see everyone’s design inspiration, and even more excited to take part in this event for the very first time. Be sure to check out the other amazing designers. Thanks for following along!
WEEK 1
At Home With Ashley | Casey Keasler | Dorsey Designs | The Farmhouse Project | Home Made by Carmona House of Funk | House of Jade Interiors | House Seven Design | House That Lars Built | Inspired by Charm | Jana Bek | Jessica Brigham | Kelly Golightly | Murphy Deesign | The Pink Pagoda | Sarah Gunn | Sherry Hart Designs | Sugar & Cloth | Veronica Solomon | Vintage Revivals | Media Partner BH&G | TM by ORC